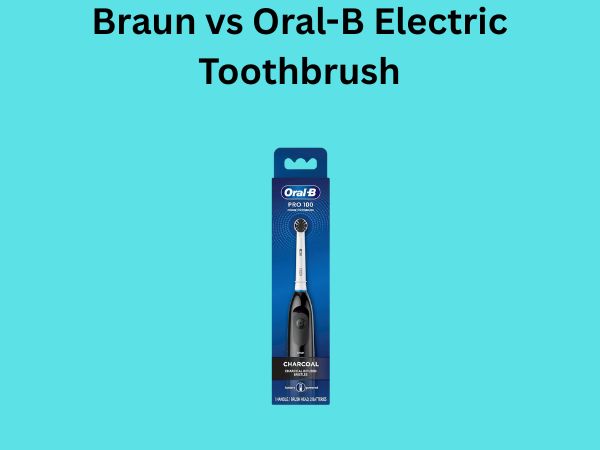
Master Your Smile: How Do You Use an Oral-B Electric Toothbrush?
Have you ever picked up an electric toothbrush and wondered if you’re actually using it correctly? You’re definitely not alone. Many people assume that because a device is electric, it automatically does all the work for you. But here’s the truth: an Oral-B electric toothbrush is more like a skilled partner than a magic wand. It requires proper technique, understanding, and a little bit of know-how to unlock its full potential.
In this comprehensive guide, I’m going to walk you through everything you need to know about using an Oral-B electric toothbrush effectively. Whether you’re a first-time user or someone looking to improve your brushing routine, you’ll discover practical tips that can genuinely transform your oral hygiene habits.
Understanding Your Oral-B Electric Toothbrush
Before we dive into the mechanics of how to use your Oral-B electric toothbrush, let’s talk about what makes it fundamentally different from a regular manual brush. An Oral-B electric toothbrush uses oscillating-rotating technology, which means the brush head moves back and forth in thousands of tiny motions per minute. Think of it like having a dentist’s assistant working inside your mouth, making precise movements that your hand simply couldn’t replicate on its own.
The beauty of this technology is that it does more of the work for you, but that doesn’t mean you should be passive. Understanding how your brush works will help you maximize its benefits and get those teeth genuinely clean.
The Technology Behind the Bristles
Most Oral-B electric toothbrushes operate at speeds ranging from 20,000 to 48,000 oscillations per minute, depending on the model. This rapid movement is specifically designed to remove plaque more effectively than manual brushing. The oscillations create a gentle yet thorough cleaning action that penetrates between teeth and along the gumline where bacteria love to hide.
Choosing the Right Brush Head for Your Needs
Not all brush heads are created equal, and selecting the correct one is your first step toward success. Oral-B offers various brush head options designed for different purposes, and understanding these choices can make a real difference in your results.
Different Brush Head Types Explained
- CrossAction heads: The standard option with angled bristles that effectively target plaque
- Sensitive heads: Designed with softer bristles for people with delicate gums
- Precision Clean heads: Smaller design perfect for reaching tight spaces
- Whitening heads: Include special polishing cups for stain removal
- Deep Clean heads: Feature longer outer bristles for extra gumline coverage
- Ortho heads: Specifically designed for people with braces
Think about your individual needs. Do you have sensitive teeth? Do you wear braces? Are you concerned about staining from coffee or tea? Your answers will guide you toward the best brush head choice. Don’t be afraid to experiment with different types until you find what feels most comfortable and delivers the results you want.
Preparing Your Toothbrush Before First Use
When you first receive your Oral-B electric toothbrush, you might feel tempted to dive right in. I’d recommend holding off for just a moment. Proper preparation ensures your brush performs at its best from day one.
Initial Setup Steps
First, remove the brush from its packaging and examine the charging station. Most Oral-B models come with either an electric charging dock or a USB charger. Place the handle on the charger and allow it to charge fully before using it for the first time. This usually takes about twelve to sixteen hours, depending on your specific model. I know it’s tempting to skip this step, but a full initial charge optimizes battery performance long-term.
While your brush charges, wet the bristles under warm running water. This softens them slightly and helps them adapt to your gums more comfortably when you start brushing. Once charging is complete, you’re ready to begin.
Mastering the Proper Grip and Positioning
Here’s where many people go wrong. They hold an electric toothbrush the same way they held their manual brush, using firm pressure and making aggressive back-and-forth motions. This is backwards, and I want you to unlearn this habit completely.
The Correct Way to Hold Your Brush
Hold your Oral-B electric toothbrush at a forty-five-degree angle to your gumline. This angle is crucial because it allows the bristles to slip gently beneath the gum tissue, where plaque actually hides. Your grip should be gentle and relaxed, almost like you’re holding a pen you’re about to sign an important document with. Your fingers shouldn’t be tense or gripping hard.
Position the brush head so that the bristles contact both your teeth and gums simultaneously. The bristles should be angled toward the gumline, not perpendicular to your teeth. This positioning maximizes cleaning effectiveness while minimizing the risk of gum irritation.
Pressure Matters More Than You Think
This is critical: the electric toothbrush is doing the work, not your hand. Let me repeat that because it’s truly important. The brush is doing the work. Your job is simply to guide it gently across your teeth. Many Oral-B models include a pressure sensor that actually alerts you if you’re pressing too hard. If your toothbrush has this feature, pay attention to those warnings.
You should feel the bristles cleaning your teeth, but you shouldn’t feel like you’re scrubbing aggressively. If your gums ever bleed or feel tender after brushing, it’s usually because you’re pressing too hard. Back off the pressure immediately.
The Complete Step-by-Step Brushing Process
Now that you understand the foundation, let’s walk through the actual brushing process from start to finish.
Step One: Wet and Apply Toothpaste
Begin by rinsing your mouth with water. Then, wet your toothbrush bristles under running water. Apply a pea-sized amount of toothpaste to the bristles. Don’t overload it; more toothpaste doesn’t mean better cleaning. A pea-sized amount is genuinely sufficient and prevents excessive foam buildup.
Step Two: Start with Your Upper Outer Surfaces
Place the brush at a forty-five-degree angle where your upper back teeth meet your gums. Turn on the toothbrush at its lowest setting. Let the brush do the work as you slowly glide it from the back of your mouth toward the front. Don’t make scrubbing motions; simply guide the brush along your teeth. Think of yourself as directing traffic, not painting a fence.
Pause briefly on each tooth before moving forward. You’re not rushing here. Spend roughly three to five seconds per tooth or tooth section to ensure adequate cleaning.
Step Three: Clean the Inner Surfaces
Now move to the inner surfaces of your upper teeth. These are often neglected, which is why plaque accumulates there more readily. Use the same gentle guiding technique, moving from back to front. Don’t forget the inner surfaces of your back molars; they’re notorious for harboring bacteria.
Step Four: Tackle the Chewing Surfaces
Hold the brush so the bristles are perpendicular to your chewing surfaces. Move gently from back to front, allowing the brush’s oscillations to clean the grooves and pits in your molars. These areas trap food particles, so don’t skip them.
Step Five: Repeat for Lower Teeth
Follow the same sequence for your lower teeth. Start with the outer surfaces, move to the inner surfaces, then clean the chewing surfaces. Many people rush through their lower teeth, but they deserve just as much attention as your uppers.
Step Six: Don’t Forget Your Tongue and Palate
Your mouth isn’t just about your teeth. Turn off your toothbrush and gently run the bristles across your tongue and the roof of your mouth. Some people use their brush for this; others prefer a dedicated tongue scraper. Either way, these areas harbor bacteria that contribute to bad breath.
Dividing Your Mouth Into Zones for Maximum Coverage
Here’s a technique that truly works: think of your mouth as divided into six distinct zones. This methodical approach ensures you never miss any area and develops a consistent routine.
The Six-Zone Mouth Map
- Zone One: Upper right outer surfaces
- Zone Two: Upper right inner surfaces
- Zone Three: Upper left outer surfaces
- Zone Four: Upper left inner surfaces
- Zone Five: Lower right outer and inner surfaces
- Zone Six: Lower left outer and inner surfaces
Spend about thirty seconds in each zone. This creates a structured approach that prevents you from spending too much time in one area while neglecting others. It’s like having a mental checklist that guides your entire brushing session.
Timing Your Brushing Session Correctly
Most dental professionals recommend brushing for two minutes. Does that sound like a long time? It might, but here’s the reality: most people seriously underbrush, spending only forty-five to sixty seconds on their entire mouth. That’s barely enough time to do a thorough job.
Why Two Minutes Matters
Two minutes allows adequate time to reach all surfaces of all your teeth. Many Oral-B electric toothbrushes include built-in timers that pause every thirty seconds, dividing your mouth into four sections. This timer feature is incredibly helpful for developing good habits. Use it until the two-minute routine becomes automatic for you.
If two minutes feels excessive when you’re starting, build up gradually. Maybe you brush for ninety seconds this week, then extend it to one hundred twenty seconds next week. Eventually, two full minutes will feel natural and normal.
Precision Cleaning of Specific Tooth Areas
Certain areas of your mouth need extra attention because they’re more susceptible to plaque buildup and decay.
The Gumline: Your Most Important Zone
The area where your teeth meet your gums is where gum disease begins. Plaque accumulates right at this junction, which is why your positioning at a forty-five-degree angle is so crucial. Spend extra time here, especially around your back molars where it’s harder to see and easier to miss.
Between Your Teeth
While your electric toothbrush does clean between teeth to some degree, it can’t replace dental floss entirely. However, electric toothbrushes are remarkably effective at removing plaque from the contact areas between teeth. Make sure your brush head is thin enough to reach these spaces, and don’t rush through this area.
Behind Your Back Molars
This is the area people most frequently forget. Those last molars in the back are challenging to reach, but they’re also prime real estate for cavity formation. Tilt your brush head and angle it so you can see what you’re doing with a mirror. Spend a solid fifteen to twenty seconds back there.
Maintenance and Care of Your Oral-B Brush
Your toothbrush is an investment in your health, and it deserves proper care to maintain its effectiveness and longevity.
Daily Maintenance Practices
After each use, rinse your brush head thoroughly under running water. Remove excess water by tapping it gently against the sink. Store your brush upright in a cup or holder that allows air circulation around the bristles. Don’t store it immediately in a closed container while it’s still wet, as this promotes bacterial growth and mold development.
Replace your brush head every three months. Even though the bristles might not look worn, they gradually lose their effectiveness over time. Think of it like replacing your car’s oil filter; you can’t see the damage, but it affects performance nonetheless.
Charging and Battery Care
Keep your toothbrush charged regularly. Most modern Oral-B models have intelligent charging systems that prevent overcharging, so leaving it on the charger is fine. However, if your model is older, avoid leaving it plugged in continuously for extended periods. Charge it when the battery indicator shows it’s low, and maintain a regular charging schedule.
Common Mistakes People Make With Electric Toothbrushes
Learning what not to do is sometimes just as valuable as learning what to do correctly.
Mistake One: Pressing Too Hard
This is the number one error. People think more pressure equals cleaner teeth. It doesn’t. It just damages your gums and doesn’t improve cleaning efficacy. Your electric toothbrush is powerful enough without added pressure from you.
Mistake Two: Skipping the Inner Surfaces
The inner surfaces of your teeth are especially vulnerable to plaque accumulation and decay, yet many people barely touch these areas when brushing. These surfaces deserve equal attention to your outer surfaces.
Mistake Three: Moving Too Quickly
Rushing through your routine defeats the entire purpose. You need time for the brush to effectively clean each tooth. Slow down, be methodical, and let the brush work for you.
Mistake Four: Ignoring the Gumline
Your gums are where gum disease starts. If you’re only cleaning the crown of your teeth and ignoring the gumline, you’re missing the most critical area. Position your brush at forty-five degrees and spend adequate time at this junction.
Advanced Techniques for Optimal Results
Once you’ve mastered the basics, you can implement some advanced techniques to enhance your results even further.
The Quadrant Technique
Divide your mouth into four quadrants: upper right, upper left, lower right, and lower left. Spend exactly thirty seconds in each quadrant, cleaning outer surfaces, inner surfaces, and chewing surfaces before moving to the next. This systematic approach ensures comprehensive coverage.
The Bass Technique
This is a technique used by dental professionals. Position your brush at a forty-five-degree angle with the bristles pointing toward the gumline. Make very small gentle vibrations without moving the brush head up and down. Let the oscillations do all the work. This technique