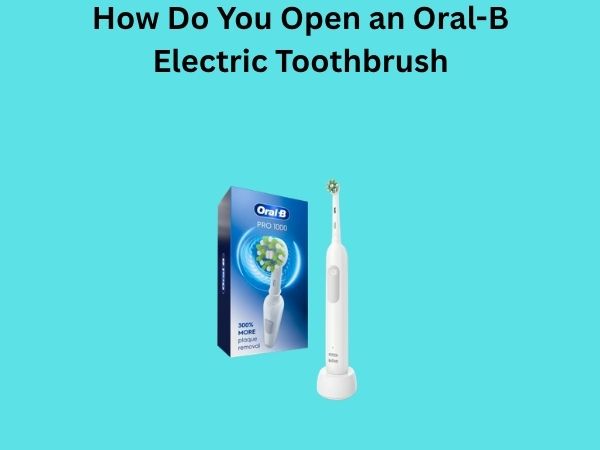
How Do You Open an Oral-B Electric Toothbrush? A Complete Step-by-Step Guide
If you’ve just purchased your first Oral-B electric toothbrush or you’re trying to figure out how to access the battery compartment for replacement, you’re probably wondering where to even start. I get it—these devices aren’t exactly designed with obvious “open here” arrows, and fumbling around with your new oral care investment can feel intimidating. But here’s the good news: opening an Oral-B electric toothbrush is actually far simpler than you might think, and I’m going to walk you through exactly how to do it.
Understanding Your Oral-B Electric Toothbrush Design
Before we dive into the mechanics of opening your toothbrush, let’s talk about why you might need to open it in the first place. Most people want to access the battery compartment to replace old batteries or check on the internal components. Whatever your reason, knowing the construction of your Oral-B device is the first step toward success.
Oral-B electric toothbrushes come in various models, and each one has a slightly different design philosophy. Some models feature a twist-open design, while others might use a snap-fit mechanism. The key is understanding which type you’re working with before you start applying force or pressure. Think of it like unlocking a door—you wouldn’t push if it’s meant to be pulled, right?
Why Would You Need to Open Your Toothbrush?
Let me break down the most common reasons people need to open their Oral-B electric toothbrush. Maybe your toothbrush has stopped working and you want to check the battery status. Perhaps you’ve had it for years and the rechargeable battery is finally giving up the ghost. Or maybe you’re just curious about what’s inside this clever little device that’s been keeping your teeth sparkling clean.
- Battery replacement or inspection
- Troubleshooting connectivity issues
- Accessing internal components for repair
- Cleaning internal compartments
- General maintenance and inspection
The Main Methods for Opening an Oral-B Electric Toothbrush
Here’s where things get interesting. Oral-B has designed their toothbrushes with different opening mechanisms depending on the model and year of manufacture. Most devices fall into a few primary categories, and once you know which category your toothbrush belongs to, you’ll be opening it like a pro in no time.
Method One: The Twist-Open Handle
The twist-open mechanism is probably the most common design you’ll encounter with Oral-B electric toothbrushes. This is the method used on many popular models, and it’s actually incredibly intuitive once you know what you’re doing.
Here’s how the twist-open method works. Your toothbrush handle typically has a seam that runs around the middle or bottom portion. This seam is where the two halves of the handle meet. To open it, you’ll want to grip the toothbrush firmly with one hand on the upper portion of the handle and twist the lower section counterclockwise. I recommend using a slight twisting motion—not a vigorous wrench—to avoid damaging the plastic or internal components.
The amount of force needed varies depending on your specific model. Some handles open with minimal effort, while others require a bit more elbow grease because the manufacturer has designed them with tighter tolerances for durability. If you feel significant resistance, don’t panic. This is actually a good sign that your toothbrush is well-made and sealed properly.
Step-by-Step Twist-Open Instructions
- Hold the toothbrush with your non-dominant hand, gripping the upper half firmly
- Use your dominant hand to gently grasp the lower half of the handle
- Apply steady, gentle pressure while twisting counterclockwise
- Listen for a slight clicking sound—this indicates the seal is breaking
- Continue twisting until the two halves separate completely
- Set the upper portion aside carefully, keeping the internal components visible
Method Two: The Snap-Fit Design
Some newer Oral-B models utilize a snap-fit mechanism instead of a twist design. These models are specifically engineered to open more quickly and are generally considered easier to access for battery replacement.
With snap-fit designs, there are typically small tabs or ridges along the seam of the handle. These act as release points. To open this type of toothbrush, you’ll look for these tabs and apply gentle pressure while slightly twisting or flexing the handle. The goal is to disengage the plastic locking tabs inside, which then allows the two halves to separate.
This method requires less force than twist-open models, which makes it ideal if you’re worried about damaging your toothbrush. However, be careful not to apply too much lateral pressure, as you could crack the plastic housing.
Opening a Snap-Fit Oral-B Toothbrush
- Locate the seam where the two halves meet
- Find any visible tabs or grooves along this seam
- Apply gentle downward pressure on one side while slightly flexing the handle
- Work your way around the seam, applying pressure at different points
- You should feel the halves begin to separate
- Once loosened, gently pull the two pieces apart
Finding the Seam: Where to Look
Here’s something that stumps a lot of people: they don’t even know where to look for the seam. Not every seam is obvious, especially on newer models with sleek designs and minimal visual breaks.
The seam is typically located near the bottom of the handle, usually about an inch or so above the brush head. It might be barely visible, appearing as nothing more than a thin line, or it could be more pronounced depending on your model. Run your finger along the bottom portion of the handle—you should be able to feel where the two plastic pieces meet.
Some Oral-B models have the seam positioned differently, perhaps running vertically along the side instead of horizontally around the circumference. Take a moment to examine your toothbrush carefully before attempting to open it. A little observation goes a long way in preventing accidents.
Visual Inspection Tips
- Hold your toothbrush up to a bright light and look for shadow lines
- Feel along the handle for raised or indented lines
- Check the bottom quarter of the handle first—this is where seams are most commonly located
- Look for any small tabs or grooves that might indicate a release mechanism
- Don’t overlook the area where the handle meets the brush head
Tools You Might Need
In most cases, you won’t need any special tools to open your Oral-B electric toothbrush. Your hands should be sufficient. However, there are situations where having the right tool can make the job significantly easier and safer.
If you have particularly weak grip strength or if the handle is unusually tight, consider having a soft cloth or rubber grip aid nearby. This can give you better traction without leaving marks on the plastic. Avoid using sharp objects or screwdrivers unless you’re absolutely certain about what you’re doing—one slip could damage irreplaceable components inside.
Recommended Items to Keep Handy
- Soft cloth or rubber grip liner
- Clean, dry hands
- Small container for storing screws or small parts
- Flashlight for inspecting internal components
- Paper towel for wiping away moisture
Safety Precautions Before You Begin
This is important, and I want you to take it seriously. Before you even think about opening your toothbrush, there are several safety measures you should consider. Electrical devices require respect, even something as seemingly innocent as an electric toothbrush.
First, make sure your toothbrush is completely dry before opening it. If you’ve just finished brushing your teeth, give it time to dry completely. Moisture inside can cause short circuits or damage to the electronics. Second, if your toothbrush is rechargeable, consider charging it fully or letting it fully discharge before opening, depending on the model—this reduces the risk of unexpected electrical behavior.
Safety Checklist
- Ensure the toothbrush is completely dry inside and out
- Remove it from the charging dock at least several minutes before opening
- Wash and dry your hands thoroughly
- Work over a clean, clear surface to avoid losing small components
- Don’t force anything—resistance usually means you’re doing it wrong
- Keep the toothbrush away from children during the process
- Take care not to touch electrical contacts with wet fingers
Model-Specific Opening Instructions
Since Oral-B manufactures numerous models, each with its own quirks, let me break down some specific instructions for the most popular models you might encounter.
Oral-B Pro Series Models
The Oral-B Pro series, including popular models like the Pro 1000 and Pro 5000, generally features a straightforward twist-open design. The seam is located approximately one-half inch above where the brush head connects to the handle. Grip the brush head area gently with one hand and twist the lower handle portion counterclockwise with your other hand. You should feel it give way after about a quarter turn, though some models require up to a half-turn.
Oral-B Smart Series Models
Smart series toothbrushes, which include Bluetooth connectivity features, often use a slightly tighter twist mechanism for better sealing. These models are designed to protect the electronic components inside, so don’t be alarmed if opening requires a bit more effort. Apply steady pressure and twist slowly—rushing the process could result in stripped threads or cracked plastic.
Oral-B Kids Models
Children’s toothbrush models typically feature snap-fit designs because they’re intended to be easier to manipulate. The seams on these models are usually more obvious visually, and they generally open with less force required. If you’re dealing with a kids’ model, try the snap-fit method first before attempting a twist.
What You’ll Find Inside
Now that you know how to open your toothbrush, you’re probably curious about what’s actually inside. The interior of an Oral-B electric toothbrush is fascinating, and understanding what you’re looking at will help you troubleshoot issues or perform maintenance.
The Battery Compartment
Once opened, you’ll immediately see the battery or battery compartment. In older models, you might find replaceable AA or AAA batteries. Newer rechargeable models contain a sealed lithium-ion battery that’s integrated into the handle. These batteries are not meant to be replaced by the user in most cases—when they fail, you’ll typically need to replace the entire toothbrush or send it in for professional service.
The Motor and Vibration Mechanism
Inside the handle, you’ll find a small but powerful electric motor that drives the vibration mechanism. This is what makes your toothbrush actually vibrate and clean your teeth. In sonic toothbrushes, the motor vibrates thousands of times per minute, creating the high-frequency oscillation that’s so effective for plaque removal.
The Circuit Board
More advanced Oral-B models contain a small circuit board that manages various functions like pressure sensing, timer functions, or Bluetooth connectivity. This is sensitive electronic equipment and should be handled carefully. Never touch the electronic contacts with wet fingers or attempt to clean them with water.
The Seal and Gasket
Pay attention to the rubber or silicone seal that runs along the inside of the seam. This is crucial for waterproofing your toothbrush. If this seal appears damaged or deteriorated, you’ll want to be extra careful when reassembling, as your toothbrush’s water resistance could be compromised.
Reassembling Your Toothbrush Correctly
Once you’ve finished whatever you needed to do inside your toothbrush, reassembly is equally important. Doing this incorrectly could damage your device or compromise its waterproofing.
Before you start putting it back together, take a moment to ensure everything inside looks dry and undamaged. If you removed the battery, make sure it’s positioned correctly before closing the handle. For twist-open models, align the two halves carefully and twist clockwise with gentle, steady pressure. You should hear or feel a satisfying click when everything is properly seated.
For snap-fit designs, simply press the two halves together firmly until you hear the tabs click into place. Don’t force it—if it’s not going together smoothly, realign the pieces and try again.
Troubleshooting Common Opening Problems
What if your toothbrush simply won’t open? Don’t worry—this happens more often than you’d think. Let me walk you through some troubleshooting steps.
The Handle is Too Tight
If the handle seems fused shut, try applying a small amount of heat. Run the toothbrush briefly under warm (not hot) water to slightly expand the plastic, which can make it easier to separate the two halves. Alternatively, try soaking the handle in warm water for a few minutes. The expansion should make the twist easier.
You’re Twisting in the Wrong Direction
I know this sounds obvious, but it happens! Try twisting clockwise if counterclockwise doesn’t work. Some older models or certain regional variants might use the opposite direction. A few gentle turns in the other direction won’t hurt anything.
The Seam Isn’t Where You Think It Is
Examine your toothbrush more carefully. Look at the packaging or manual to see if there are any diagrams showing where the seam is located. Different models vary widely, and the seam might be in an unexpected place.
You’re Applying Too Much Force
If you feel extreme resistance, stop immediately. This usually means you’re doing something incorrectly. Trying to force it could result in permanent damage. Take a step back, examine the toothbrush again, and reconsider your approach.
When Not to Open Your Toothbrush
There are definitely situations where opening your toothbrush is not a good idea. If your toothbrush is still under warranty and malfunctioning, don’t open it. Opening the device will likely void your warranty, and the manufacturer won’t be able to service it. Contact Oral-B customer service instead.
Similarly, if you’re uncomfortable with working on electronic devices or if you’re not entirely sure what you’re doing, it might be wise to leave the toothbrush closed. There’s no shame in asking for professional help or reaching out to customer support.
Conclusion
Opening an Oral-B electric toothbrush isn’t as mysterious or complicated as it might seem at first. Whether your toothbrush uses a twist-open mechanism or a snap-fit design, the process is generally straightforward once you know what to look for. Start by identifying the seam, determine which opening method your specific model uses, and apply gentle, steady pressure rather than force. Remember that the key is patience and careful observation before you actually start twisting or pulling.
Most importantly, handle your toothbrush with care throughout the process. These devices contain delicate electronic components and