How Do You Know When Electric Toothbrush Is Charged? A Complete Guide to Battery Management
Have you ever picked up your electric toothbrush in the morning, only to realize it’s completely dead? It’s one of those frustrating moments that can derail your morning routine. The thing is, most people don’t really pay attention to their electric toothbrush’s charging status until it’s too late. You’re standing there, holding a useless gadget, wondering why you didn’t check it the night before. But here’s the good news: understanding how to properly monitor your electric toothbrush’s charge is simpler than you might think, and I’m here to walk you through it.
Understanding the Basics of Electric Toothbrush Charging Indicators
Think of your electric toothbrush’s charging system like the fuel gauge in your car. Just as you wouldn’t want to run out of gas on the highway, you don’t want your toothbrush dying mid-brushing session. The key is knowing how to read the signals your toothbrush is sending you.
Most modern electric toothbrushes come equipped with some form of charging indicator. This isn’t just a fancy feature—it’s essential information that helps you keep your device functional and ready to use whenever you need it. The challenge is that different manufacturers use different methods to communicate charging status, and if you’re not familiar with yours, you might miss the signals entirely.
Why Knowing Your Toothbrush’s Charging Status Matters
Your electric toothbrush isn’t like your smartphone, which you can use even when it’s partially charged. Most electric toothbrushes need to be fully functional to provide the deep cleaning you’re paying for. When the battery is low, the vibrations might not be strong enough to effectively remove plaque and tartar. Additionally, continuously draining your battery completely can actually damage it over time, reducing its overall lifespan. It’s like running your car on empty repeatedly—eventually, you’ll do damage that’s hard to reverse.
LED Light Signals and What They Actually Mean
The most common way electric toothbrush manufacturers indicate charging status is through LED lights. These tiny lights are like your toothbrush’s way of communicating with you. But here’s the thing—they’re not all the same.
Interpreting Different LED Colors
Most electric toothbrushes use a color-coded system. A green LED light typically means your toothbrush is fully charged or is actively charging without any issues. Red usually indicates that your toothbrush is either low on battery or still charging and not yet ready to use. Some brands use a combination of colors that cycle or blink to show different states.
- Solid green light: Fully charged and ready to go
- Blinking green light: Currently charging at a normal rate
- Red light: Low battery warning
- Blinking red light: Currently charging but still needs more time
- Amber or yellow light: Medium battery level (some brands)
How Long Should You Wait for the Light to Change?
This varies by model, but most electric toothbrushes take between 16 to 24 hours for a full charge from completely dead. However, if you’re simply topping it off after regular use, you might see the LED change from red to green within a few hours. The first time you charge your toothbrush, it might take longer because the battery needs to be properly calibrated.
Digital Display Screens and Their Charging Information
If your electric toothbrush is a premium model, it might come with a small digital display screen. These screens are incredibly helpful because they literally show you the percentage of battery remaining. It’s like having a real fuel gauge instead of just a “full” or “empty” indicator.
Reading Percentage-Based Battery Indicators
When your toothbrush has a display screen, you’ll typically see a battery icon with a percentage. Most people keep their toothbrush charged when it drops below 20%, similar to how they’d refuel their car. The beauty of a percentage indicator is that you can plan ahead. If your screen shows 30%, you know you have time to use it for a few more days before you absolutely need to charge it.
Some advanced models even show you how much time is left before the battery completely drains. This information is invaluable if you’re traveling and want to know whether you need to pack your charger.
Understanding Battery Capacity Displays
More sophisticated electric toothbrushes might show a battery capacity bar rather than a percentage. This visual representation works just like the battery indicator on your phone—the fuller the bar, the more charge you have. An empty bar means your toothbrush won’t turn on, while a full bar means you’re good to go for several brushing sessions.
Vibration Patterns and Audio Cues as Charging Signals
Not all charging indicators are visual. Some toothbrush manufacturers have gotten creative and use vibration patterns or sounds to communicate charging status. This is particularly helpful if you’re someone who doesn’t always notice lights.
Decoding Vibration Patterns
When you plug in your toothbrush, it might give you a single strong vibration to confirm that charging has begun. Once it’s fully charged, it might vibrate in a different pattern—perhaps two quick pulses—to let you know you’re good to go. Some models will vibrate every few hours when charging is complete, reminding you to unplug it.
Audio Notifications and Beeps
A few high-end electric toothbrush models include audio notifications. You might hear a subtle beep when you place it on the charging dock, indicating that the charging process has started. Another beep pattern might signal that charging is complete. While these sounds might seem minor, they’re actually incredibly practical, especially for people with visual impairments or those who simply prefer auditory feedback.
Different Brands and Their Unique Charging Systems
Here’s where things get a bit complicated. Not every brand follows the same charging indicator system. Let me break down how some of the most popular brands communicate charging status.
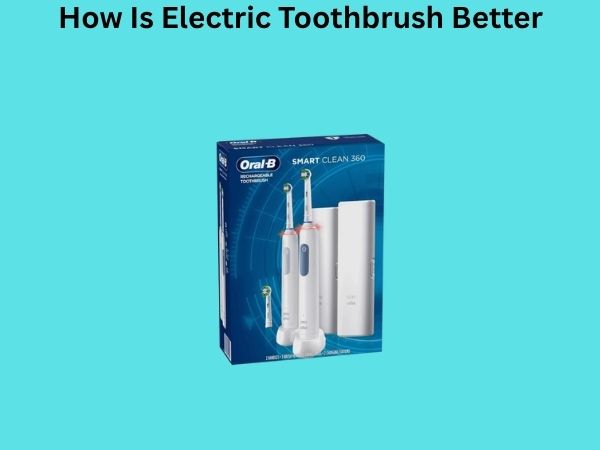
Oral-B Charging Indicators
Oral-B, one of the leading electric toothbrush manufacturers, typically uses a simple system. Most Oral-B models have an LED light that shows charging status. When you place the toothbrush on the charger, you’ll see a red light. Once it’s fully charged, the light turns green. Some newer Oral-B models have a small battery icon on the handle that lights up to show the approximate battery level.
Sonicare by Philips System
Philips Sonicare uses a slightly different approach. Their toothbrushes often have a power button that glows when you’re charging the device. The intensity of the glow can indicate the battery level. Additionally, some Sonicare models will vibrate in a specific pattern when fully charged, signaling you to remove them from the charger.
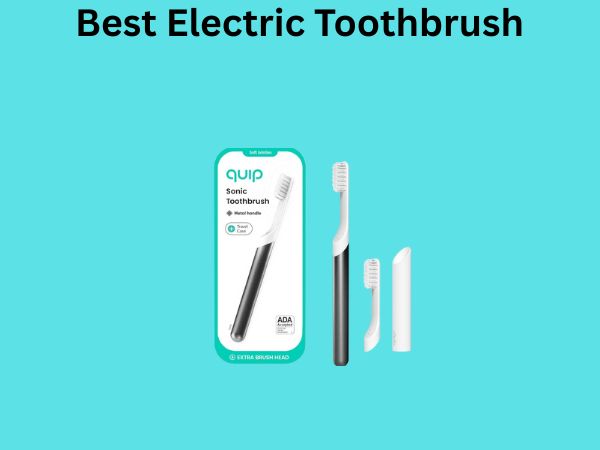
Quip and Other Budget-Friendly Options
Budget electric toothbrushes like Quip often have simpler charging systems. Quip toothbrushes don’t have built-in LED indicators. Instead, they rely on a charging cover that has a small light. When you dock the toothbrush in its charging cover, the light turns on, indicating that charging is in progress. Some users find this refreshingly simple, while others prefer more detailed feedback.
Premium Brands Like Waterpik and Panasonic
Premium brands tend to offer multiple indicators. A Waterpik toothbrush might have both an LED light and a digital display. Panasonic models often include vibration feedback along with LED indicators. These redundant systems ensure that no matter what, you’ll notice when your toothbrush is charged.
How to Properly Charge Your Electric Toothbrush
Understanding charging indicators is only half the battle. You also need to know how to charge your toothbrush correctly to keep the battery healthy and ensure those indicators work reliably.
The Initial Charge: What You Need to Know
When you first get your electric toothbrush, the battery isn’t necessarily empty, but it might not be fully conditioned. Most manufacturers recommend charging your toothbrush for the full recommended time—usually 16 to 24 hours—before using it for the first time. This initial charge helps calibrate the battery’s internal sensor, which is why your charging indicators will be most accurate after this first full charge.
Daily Charging Best Practices
After that initial charge, you don’t need to wait as long between uses. Most people keep their toothbrush on the charger overnight or during the day. Modern electric toothbrush batteries are designed to handle regular charging without degradation, unlike older battery technology. It’s actually better to keep your toothbrush charged regularly rather than letting it completely die.
- Charge your toothbrush every night or at least every other night
- Don’t wait until the battery is completely dead
- Keep the charging contacts clean and dry
- Avoid extreme temperatures while charging
- Never force the toothbrush onto the charger—it should fit snugly
Common Mistakes People Make With Their Toothbrush Batteries
I’ve noticed that people make several recurring mistakes when it comes to charging their electric toothbrushes. Let me highlight the most common ones so you can avoid them.
Overcharging and Its Effects
Many people worry about overcharging their toothbrush. While this was a legitimate concern with older battery technology, modern lithium-ion batteries—which power most electric toothbrushes—have built-in protection circuits. These circuits prevent the battery from accepting charge once it’s full. That said, leaving your toothbrush plugged in for weeks without use isn’t ideal. It’s better to charge it when you need it and unplug it once it’s done.
Letting the Battery Completely Drain
This is probably the most damaging thing you can do to your toothbrush battery. Completely draining lithium-ion batteries regularly can significantly shorten their lifespan. It’s like pushing your car to completely run out of gas constantly—eventually, the fuel pump gets damaged. Try to charge your toothbrush before the battery completely dies.
Ignoring Charging Indicator Signals
This might seem obvious, but you’d be surprised how many people ignore the red LED light telling them their toothbrush needs charging. They just keep using it until it dies. Pay attention to those signals. They’re there for a reason.
Using Incorrect Chargers
Always use the charger that came with your toothbrush or an officially approved replacement. Using a generic charger might damage your battery or fail to charge it properly. The wrong charger can deliver too much voltage, which can reduce battery lifespan significantly.
Tips for Maintaining Optimal Battery Health
Want to make sure your electric toothbrush’s battery lasts for years? Here are some practical tips that actually work.
Storage Considerations
If you’re not going to use your toothbrush for an extended period—say, you’re traveling or replacing it—store it with a partial charge. A completely dead or completely full battery sitting idle can degrade faster. Aim for about 50% charge if you’re storing it for more than a month. Keep it in a cool, dry place away from extreme heat or cold.
Keeping Charging Contacts Clean
Over time, the metal contacts on your toothbrush and charger can accumulate mineral deposits, especially in areas with hard water. These deposits can interfere with proper charging and even prevent the toothbrush from charging at all. Occasionally wipe down the contacts with a dry cloth. If they’re really dirty, use a slightly damp cloth, but make sure everything is completely dry before plugging in the charger.
Temperature Management
Don’t charge your toothbrush in extremely hot environments, like near a heater or in direct sunlight. High temperatures can degrade battery performance. Similarly, very cold temperatures can temporarily reduce battery efficiency. Room temperature is ideal for charging.
When to Replace Your Electric Toothbrush Battery
Even with perfect care, every battery eventually wears out. Most electric toothbrush batteries last between three to five years, depending on usage and maintenance. But how do you know when it’s time for a replacement?
Signs Your Battery Needs Replacement
If your toothbrush is no longer holding a charge as long as it used to, or if it keeps giving you low battery warnings despite being charged, the battery is probably nearing the end of its life. Some toothbrushes will refuse to turn on even when freshly charged, indicating battery failure. Another sign is if the charging indicator light stops working—if you can’t get any feedback about your toothbrush’s status, the internal circuitry might be failing.
Replacement Options
You have a few choices when your battery dies. You can buy a replacement battery if your toothbrush manufacturer offers them separately. Some electric toothbrushes have user-replaceable batteries, though many modern models don’t. Your other option is to replace the entire toothbrush. While this might seem wasteful, modern toothbrushes are often more advanced than older models, so it might be worth the upgrade.
Troubleshooting Charging Issues
What do you do if your toothbrush isn’t charging properly? Before you give up, try these troubleshooting steps.
The Toothbrush Won’t Charge At All
First, check if the charger is properly plugged into the wall outlet. Test the outlet with another device to make sure it’s working. Next, examine the charging contacts on both the toothbrush and the charger for any debris or corrosion. Clean them gently with a dry cloth. Make sure the toothbrush is properly seated on the charger—sometimes it needs to be at a specific angle. If nothing works, your charger might be faulty, and you might need a replacement.
The Battery Drains Quickly
If your toothbrush is losing charge unusually fast, the battery might be aging. However, before concluding that, check your brushing habits. If you’re using the toothbrush more frequently than usual, it’ll obviously drain faster. Also, make sure you’re not leaving it on the charger in an extremely warm location, as heat can reduce battery efficiency temporarily.