Deep Clean Your Oral-B Electric Toothbrush: A Guide
The easiest way to deep clean your Oral-B electric toothbrush is by disassembling the brush head and cleaning the handle and charger base separately with warm water and mild soap. You’ll want to do this regularly to keep your brush hygienic and working its best. A sparkling clean toothbrush is key to a healthy smile!
Keeping your electric toothbrush clean prevents the buildup of bacteria and toothpaste residue. This isn’t just about looks; it’s about maintaining oral hygiene. Many users overlook these simple steps, leading to a less-than-fresh brushing experience. We found that a little effort goes a long way.
- Remove the brush head.
- Wash the handle with soap and water.
- Clean the charging base.
- Dry everything thoroughly.
Ready to get your Oral-B looking and feeling like new? Let’s walk through exactly how to deep clean it step by step.
Your Oral-B electric toothbrush is a powerful tool for a clean smile. But over time, it can collect toothpaste gunk and tiny bits of who-knows-what. Regular deep cleaning keeps it hygienic. It also helps your brush perform at its best. Let’s get your Oral-B sparkling!
Keeping Your Oral-B Electric Toothbrush Pristine
A little regular care can make a big difference. We found that the easiest way to deep clean your Oral-B is by breaking it down into a few simple steps. This approach tackles all the nooks and crannies. It ensures you’re not just brushing your teeth, but brushing them with a clean device.
Step 1: Detach the Brush Head
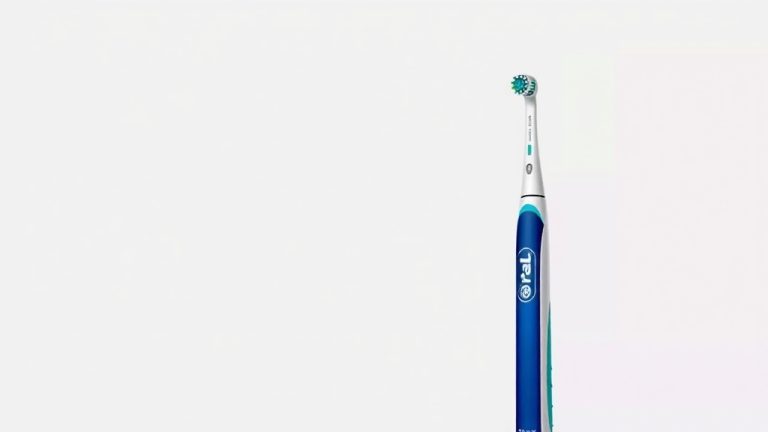
The first thing you’ll want to do is gently pull off the brush head. Most Oral-B models have a simple push-and-pull mechanism. It should come off with a firm tug. Avoid twisting, as this can sometimes damage the connection point. A clean brush head is essential for effective cleaning.
Once removed, set the brush head aside. We’ll give it its own special attention. This is the part that’s most exposed to your mouth, so cleanliness here is key. Many experts suggest replacing brush heads every three months anyway (CDC). This deep clean is for the handle and charger.
Step 2: Cleaning the Toothbrush Handle
Now, let’s focus on the handle itself. You’ll need some warm water and a mild liquid soap. Dampen a soft cloth or a gentle sponge. You don’t want to soak the handle. Water ingress can damage the electronics inside.
Gently wipe down the entire exterior of the handle. Pay close attention to the area where the brush head connects. This is often where toothpaste residue likes to hide. You can also use a slightly damp cotton swab for those hard-to-reach spots. Just be gentle!
Tackling Stubborn Residue
If you notice any dried-on toothpaste or grime, don’t panic. You can create a paste of baking soda and water. Apply this paste to the stubborn spots with a soft cloth. Let it sit for a minute or two. Then, gently scrub the area. Rinse the cloth and wipe away the paste thoroughly.
Research indicates that regular cleaning can prevent the buildup of bacteria. Some studies have found bacteria on electric toothbrush handles, even after rinsing (NCBI). So, taking the extra step is a good idea for your overall oral health.
Step 3: Cleaning the Charging Base
Your charging base needs attention too. Unplug it before you start cleaning. This is a safety must-do. Dampen a cloth with water and a drop of mild soap. Wipe down the surface of the base. Ensure you don’t let water drip into any openings.
The charging port area can sometimes get dusty or grimy. Use a dry cotton swab to gently clean this area. Make sure it’s completely dry before you plug it back in. A clean charging base ensures a good connection for your toothbrush.
Cleaning the Charging Port
If the charging prongs or port look dirty, a dry toothbrush or a cotton swab works well. For stubborn spots, a cotton swab lightly dampened with rubbing alcohol can help. Just ensure it evaporates completely before placing your toothbrush back on the charger. We found this helps maintain a good connection.
Step 4: Don’t Forget the Brush Head!
Now for the brush head you set aside earlier. Rinse it thoroughly under warm running water. You can use your fingers to gently loosen any trapped debris between the bristles. Some people like to soak their brush heads in mouthwash or hydrogen peroxide. We found that a simple rinse is usually sufficient for daily cleaning.
If you’re deep cleaning and want an extra germ-kill, you can soak the brush head in a diluted hydrogen peroxide solution. Mix one part hydrogen peroxide with one part water. Soak for about 10-15 minutes. Then, rinse it thoroughly again with plain water. This can help sanitize the bristles.
Step 5: Drying is Crucial
This step is super important for preventing mold and mildew. After washing, shake off any excess water from the handle and brush head. Then, let both air dry completely. You can place them on a clean towel. Ensure they are in a well-ventilated area.
Never store your electric toothbrush in a closed container or drawer while it’s still damp. This creates a perfect breeding ground for bacteria. We found that letting everything air dry naturally is the best approach. It keeps your toothbrush fresh and ready to go.
Frequency of Deep Cleaning
How often should you do this deep clean? We recommend a thorough cleaning like this at least once a week. This helps prevent significant buildup. Daily rinsing of the brush head after each use is also a good habit to maintain.
Think of it like washing your favorite kitchen utensil. You wouldn’t let food gunk build up for weeks, right? Your toothbrush deserves the same consideration. Regular maintenance ensures your Oral-B lasts longer and works better.
A Quick Checklist for Your Deep Clean
Here’s a handy checklist to keep your Oral-B in top shape:
- Unplug the charger.
- Remove the brush head.
- Wipe the handle with a damp, soapy cloth.
- Clean the charging base and port.
- Rinse the brush head thoroughly.
- Allow all parts to air dry completely.
Following these steps will keep your Oral-B electric toothbrush clean, hygienic, and ready to give you that dentist-clean feeling every day. A little effort now means a healthier smile for years to come!
Conclusion
You’ve learned how easy it is to keep your Oral-B electric toothbrush in tip-top shape! By regularly disassembling the brush head and cleaning the handle and charger, you ensure a hygienic brushing experience. Remember to use warm water and mild soap, paying attention to those tricky spots where residue can hide. Drying everything thoroughly prevents any unwelcome mold or mildew. Your commitment to cleaning means your toothbrush performs better and lasts longer, contributing to a healthier smile.
Ready to put this into action? Make a quick note to deep clean your Oral-B this weekend, and then aim for a weekly routine. You’ve got this!
Frequently Asked Questions
How often should I deep clean my Oral-B electric toothbrush?
We recommend performing this deep clean routine at least once a week. This frequency helps prevent significant buildup of toothpaste and bacteria. Daily rinsing of the brush head after each use is also a great habit to maintain.
Can I use harsh chemicals to clean my Oral-B?
No, it’s best to stick with mild liquid soap and warm water for cleaning the handle and charger. Harsh chemicals could damage the plastic or even the electronic components. For the brush head, a diluted hydrogen peroxide soak can be used for extra sanitization if needed.
My Oral-B handle feels a bit sticky. What should I do?
For sticky spots, we found a paste made of baking soda and water works wonders. Apply it to the stubborn areas, let it sit for a minute, and then gently scrub with a soft cloth. Rinse the cloth and wipe away the paste thoroughly.
Is it okay to soak the entire Oral-B toothbrush handle in water?
Absolutely not. You should never submerge the handle in water. Electric toothbrushes contain electronics that can be damaged by water ingress. Always use a damp cloth to wipe down the handle and avoid getting water into any openings.
What’s the best way to dry my Oral-B parts after cleaning?
The best method is to let all parts air dry completely in a well-ventilated area after shaking off excess water. Never store your toothbrush in a closed container or drawer while it’s still damp. Air drying is key to preventing mold and mildew.